Winter camping for beginners comes down to three things: staying dry, insulating yourself from the ground, and keeping fuel-burning gear out of your tent. Get those right and a cold night is manageable. Get them wrong and even a mild night can turn dangerous. This beginner’s guide to winter camping gives you 15 practical tips, a beginner gear table, and the safety rules that matter most. Whether you are comparing camping destinations or deciding which camping options suit your experience, start with a short, accessible trip.
Quick Answer: To stay warm winter camping, wear wool or synthetic layers (never cotton), sleep on a pad rated R-5 or higher for snow or frozen ground, use a bag with a comfort rating at or below the night’s expected low, eat a fatty snack before bed, and keep every stove and heater outside your tent. Start with a short car-camping trip.
Key Takeaways
- Keep your first winter camping trip short, close to your car, with a mild forecast. Your gear’s tested ratings, not one magic temperature, should set your limit.
- Sweat is a bigger threat than cold air. Layer so you can vent heat before you soak your clothes.
- Your pad matters as much as your bag. Aim for a combined R-value of 5 or higher when sleeping on snow or frozen ground.
- Never use a camp stove, heater, or lantern inside a tent, and cracking a vent does not make it safe. Carbon monoxide has no smell and kills in your sleep.
- Learn the early signs of hypothermia and frostbite, and agree on your turn-around rules before you leave.
- Stay on flat, low-angle ground and out from under steep slopes unless you are trained in avalanche safety.
Disclosure: As an Amazon Associate, CampingSaga earns from qualifying purchases. Links to gear guides on this site may lead to affiliate links at no extra cost to you.
15 Tips for Winter Camping for Beginners
1. Start With a Short, Easy First Trip
Pick a one-night car-camping trip with a mild forecast, close to your vehicle. If something goes wrong, you can be in a warm car in minutes.
If you are new to winter camping, remember that winter camping experience builds gradually; there is no single “safe” temperature for a first trip, because your limit depends on your gear’s tested ratings, wind, moisture, how tired and fed you are, and your experience. A practical way to set your own limit: find your sleeping bag’s comfort rating, confirm your pad’s R-value suits the ground, then choose a forecast low that sits comfortably above both, with a margin for forecast errors. Many people start with a night near or above freezing, 32°F (0°C), and work colder as their gear and skills improve. Treat that as a starting point, not a guarantee.
Look for a winter campsite at a campground that stays open in winter and has road access. If you want to camp in winter for the first time, choose a maintained campground rather than remote camping in the snow. Choose an easy-access location rather than a remote destination, and check whether the campground allows winter camping. Pitch your tent in the yard once before you go, wearing gloves, so you are not learning the poles with numb fingers. Use the camping checklist for beginners as a base and add the cold-weather items from the gear table below. If cost is the worry, our guide to camping on a budget shows what to borrow and what to buy first.
2. Check the Forecast, Daylight, and Your Exit Plan
Look at the overnight low, wind speed, and precipitation forecast, then plan to set up camp before dark. Keep an eye on the weather throughout the trip: cold temperatures, changing winter conditions, and sudden cold temps can make a familiar route more demanding. Wind and wet make any temperature feel harsher and cost you heat faster. Winter days are short, and everything takes longer in the cold.
Pack a headlamp and spare batteries (lithium batteries hold up better in cold than alkaline). Our list of camping flashlights covers options. Tell someone your campsite, your return time, and the time they should call for help. If you are going alone, read is camping alone safe first, since a solo mistake in winter has fewer ways to be fixed.
3. Choose a Sheltered, Safe Campsite
Camp on flat ground with a windbreak, away from steep slopes, and out from under heavy branches. Cold air also settles in low hollows, so a slightly raised, sheltered spot is usually warmer than a valley floor.
Check overhead for dead limbs and snow-loaded branches. Heavy snow and high winds increase the risk of falling branches and changing snow conditions. If you plan to snowshoe, choose a route suited to your ability and avoid steep avalanche terrain. Stay off frozen lakes and rivers, because you cannot judge ice thickness by looking. Pack the snow flat with your boots before pitching so you do not sink into soft spots. For more tips for winter camping, see how to choose the perfect campsite. The avalanche section below explains why slope angle also matters.
4. Pick a Tent That Matches the Conditions
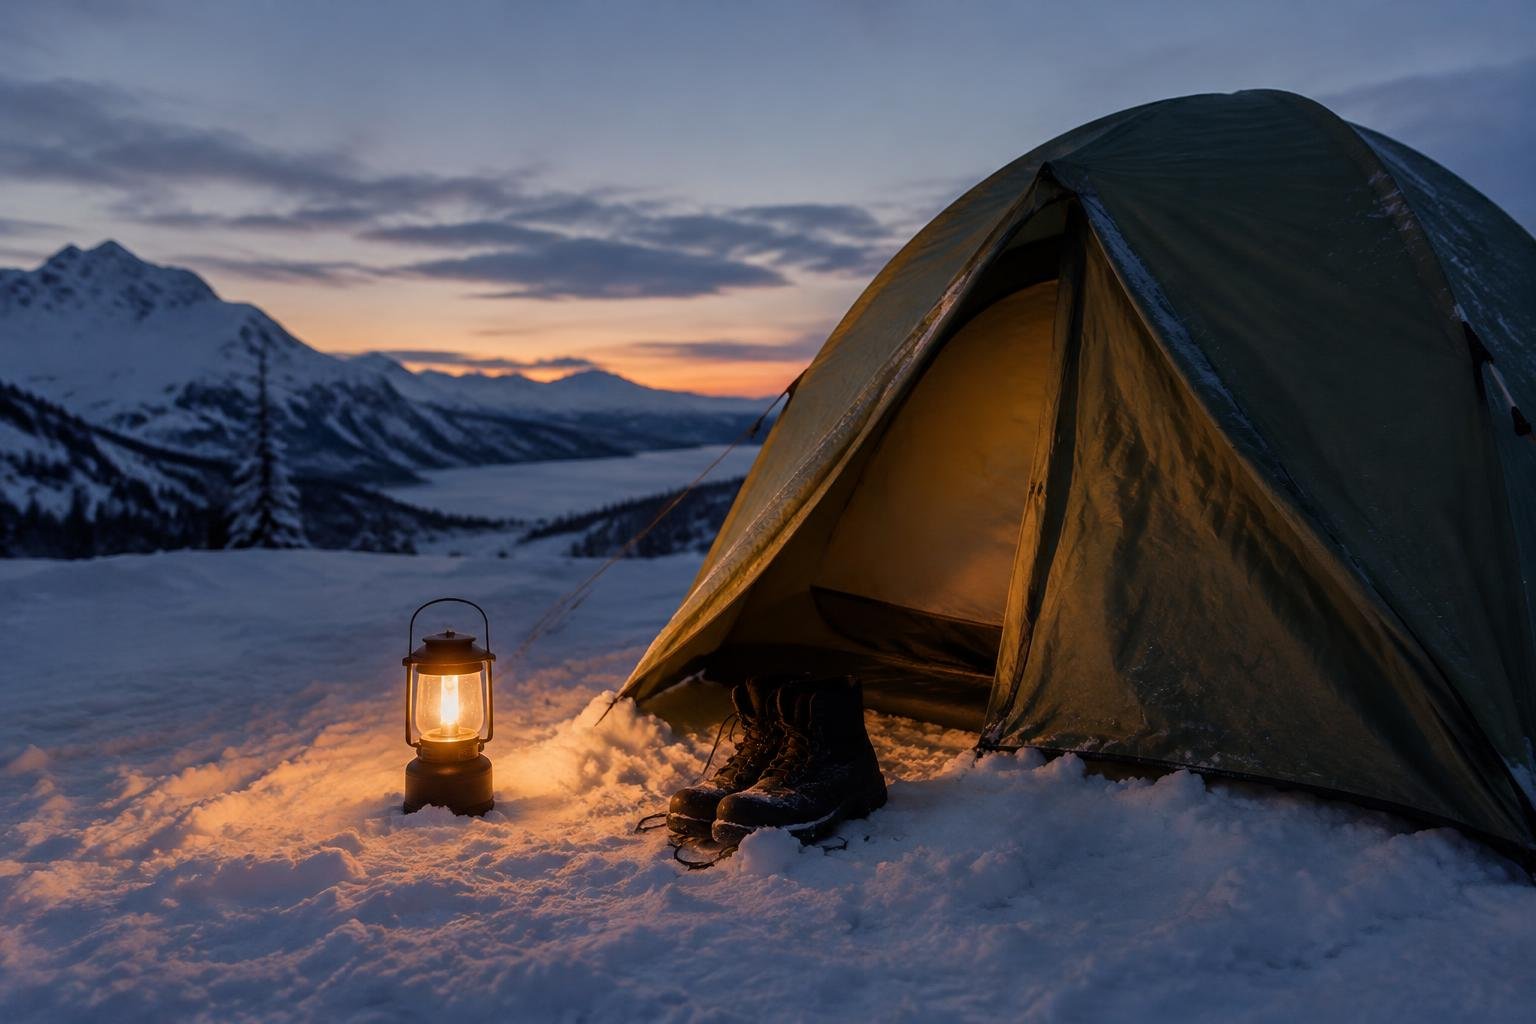
A three-season tent can work for mild winter nights with no snow load and little wind. The right winter tent for your trip depends on the forecast, expected snow, wind exposure, and the manufacturer’s specifications. A four-season tent is the safer choice for snow and strong wind. Four-season tents use stronger poles and have less mesh, so they hold up under snow and block drafts.
A smaller tent may feel more sheltered, but it is not a substitute for an insulated sleep system. Keep vents partly open to limit condensation, and set up camp before dark so you have time to secure the tent and organize your winter gear. Bring the right gear for the conditions, including extra gear for unexpected delays. The right winter gear is more important than packing lots of unnecessary equipment.
Use snow stakes or bury stuff sacks as anchors, because regular stakes do not hold in snow. Our guides to choosing a camping tent, tents for windy conditions, and how to set up a tent cover the details. A stove-heated tent is an advanced setup that needs a stove-rated tent, proper clearances, spark protection, and a CO alarm, so skip hot tent camping until you have a few cold nights behind you.
5. Dress in Three Layers
Wear a wicking base layer, an insulating mid layer, and a waterproof, windproof shell. Adjust the layers as you work and rest so you stay warm without sweating.
| Layer | Job | What to look for | Avoid |
|---|---|---|---|
| Base | Pulls sweat off your skin | Merino wool or synthetic, snug fit | Cotton |
| Mid | Traps warm air | Fleece, synthetic puffy, or down (keep it dry) | Bulky cotton hoodies |
| Shell | Blocks wind, snow, and rain | Waterproof or water-resistant, with vents | Non-breathable plastic ponchos |
| Camp insulation | Warmth when you stop moving | A big insulated jacket and insulated pants | Skipping it because it is bulky |
6. Manage Sweat and Skip the Cotton
Cotton holds moisture and pulls heat away from your body, so leave it at home. Sweat that soaks your base layer is the most common reason beginners get cold.
Take a layer off before you start a chore like collecting wood or setting up, and put it back on the moment you stop. Your goal is to stay warm and dry rather than letting sweat build up under your clothing. Open zippers and pit vents to dump heat early. Pack a dry base layer and dry socks that you only wear to sleep. For more ways to hold heat, see our guide to staying warm while camping.
7. Protect Your Hands, Feet, and Head
Use insulated winter boots with room for your toes, wool socks, mittens over gloves, and a warm hat. The combination matters in winter and snow because tight footwear can restrict circulation. Tight boots cut off circulation, and cold fingers and toes are where frostbite starts.
Mittens keep fingers warmer than gloves because your fingers share heat. Bring a spare pair of dry socks and swap any damp pair before bed. Chemical hand warmers help in a pinch, but treat them as a bonus rather than your main plan.
8. Choose the Right Sleeping Bag Rating
Choose a sleeping bag with an ISO comfort rating comfortably colder than the lowest overnight temperature you expect. Leave a margin for forecast errors, wind exposure, individual cold sensitivity, and unexpected changes in conditions. Never plan around the Extreme rating. A “0°F bag” is not a bag that keeps most people comfortable at 0°F, which is where many beginners go wrong. Check whether a 0-degree sleeping bag is labeled with a comfort or limit rating before relying on it.
Most quality bags use the ISO 23537 (formerly EN 13537) test. It gives you three numbers, and they mean different things:
| Rating | What it means | How to use it |
|---|---|---|
| Comfort | Temperature at which a standard woman can sleep relaxed | Best number for planning, especially if you sleep cold |
| Limit (lower limit) | Temperature at which a standard man can sleep curled up without waking from cold | Only for people who sleep warm |
| Extreme | Survival rating with a risk of hypothermia | Never use for planning |
Brand-only ratings like “20°F” often refer to the limit number, so check which one it is. Lab ratings also assume you are sleeping on a well-insulated pad, so your own result will vary with your metabolism, food, hydration, and clothing.
Use this table as a starting point, not a promise. Forecasts can miss, conditions vary with elevation, and you sleep colder when tired or hungry, so add a margin below the forecast low.
| Expected overnight low | Bag comfort rating to look for | Notes |
|---|---|---|
| Above 40°F (4°C) | A 3-season sleeping bag | Fine for mild nights, not for real winter |
| 25°F to 40°F (-4°C to 4°C) | Comfort rating near 20°F (-7°C) | Pair with a pad rated for the ground |
| 10°F to 25°F (-12°C to -4°C) | Comfort rating near 0°F (-18°C) | Add a good pad and dry clothing |
| Below 10°F (-12°C) | Comfort rating -10°F (-23°C) or lower | Mistakes escalate quickly, so build experience first |
A sleeping bag liner adds some warmth, but manufacturers’ claims vary, so treat it as a small bonus rather than a replacement for a warmer bag. For picks, see our sleeping bags for cold weather and how to choose a sleeping bag guides.
9. Insulate From the Ground With the Right Pad
Choose a sleeping pad with an R-value of 5 or higher as a useful starting point for many trips on snow or frozen ground. Colder conditions and personal cold sensitivity may require more insulation. The ground pulls heat out of you all night, and a bag cannot insulate the part of it you are lying on. Your sleeping bag at night works best as part of a complete sleep system.
R-value measures a pad’s resistance to heat flow, and a higher number means more insulation. Many brands and retailers treat R-5 as the starting point for winter use on snow or frozen ground, while milder nights on bare, unfrozen ground can call for less. Look for a pad tested to the ASTM F3340 standard so you can compare brands fairly. R-values add together when you stack pads, so an R-3 inflatable on top of an R-2 foam pad gives you roughly R-5. (Sea to Summit explains this in its R-value guide.)
| Pad type | Typical R-value | Best for |
|---|---|---|
| Uninsulated air pad | About 1 to 2 | Summer only |
| Closed-cell foam pad | About 2 to 3.5 | Budget layer under another pad, sit pad |
| Self-inflating pad | About 2 to 5 | Car camping, mild winter nights |
| Insulated inflatable pad | About 3 to 7 or more | Winter use, often stacked with foam |
The cheapest winter setup is often a closed cell foam pad under an insulated inflatable pad. This layered approach can be useful in winter, while a lighter uninsulated pad may be enough for some summer camping trips on warm ground. Our ultralight sleeping pad guide compares options. Always check the manufacturer’s tested R-value, since some brands list numbers that were not measured to the ASTM standard. An R-5 pad is a useful starting point, not a universal guarantee for every winter campsite.
10. Eat and Drink Enough
Eat plenty of calories during the day, and have a fatty or slow-digesting snack right before bed. Your body makes heat by burning fuel, and a cold night burns more of it.
Good options include nuts, cheese, chocolate, peanut butter, and hot meals with fat and carbs. Drink warm fluids all day, because cold, dry air makes dehydration easy to miss. Skip alcohol. It can make you feel warm while you actually lose heat faster, it hurts your judgment, and the CDC lists alcohol use as a risk factor for hypothermia. Our guide on how to cook food while camping has simple meal ideas.
11. Cook and Heat Safely: Stoves, Fuel, and Carbon Monoxide
Never use a camp stove, heater, lantern, or grill inside a tent, vestibule, or any enclosed shelter. Do not operate a canister stove inside your tent, even with a door or vent open; cook outside in the winter in a stable, well-ventilated area away from fabric and combustible gear. Carbon monoxide (CO) is odorless and colorless, and the CDC says fuel-burning camping equipment should never be used inside a tent.
CO symptoms include headache, dizziness, weakness, nausea, and confusion, and the U.S. Consumer Product Safety Commission notes they can be mistaken for a cold or flu. A sleeping person may never notice them. Use this checklist:
- Cook outside, in the open, on a flat stable base. Pack snow flat or set the stove on a board so it does not sink. Keep it clear of tent walls, low branches, and gear.
- Do not rely on ventilation. Cracking a door or vent does not make cooking or heating inside a tent safe. CO can still build up, and stoves also cause tent fires. In a storm, a cold no-cook meal is safer than a stove in your shelter.
- Do not warm your tent with a stove or heater. Some heaters are sold as tent-safe, but the CDC and CPSC guidance is to keep fuel-burning devices out of enclosed shelters. Our tent heater guide exists because readers ask, but the official guidance above is the baseline.
- Treat a CO alarm as a backup, not permission. Use an appropriately rated carbon monoxide alarm in enclosed accommodations where fuel-burning appliances are installed, following the alarm manufacturer’s instructions. It is a backup only and never makes unsafe stove use inside a tent acceptable.
- If you warm up in your car, clear snow from the tailpipe before running the engine, and never sleep in a running vehicle.
- Choose the right fuel for the cold. Canister fuel is a blend of gases with very different boiling points: propane boils at about -44°F (-42°C), isobutane at about 11°F (-12°C), and n-butane at about 31°F (-1°C). Pure butane struggles near freezing, and blends with more propane or isobutane work better. As a canister empties, the propane burns off first, so performance fades. Our propane vs butane camp stove guide explains the difference.
- Handle canisters carefully. Follow the stove manufacturer’s instructions to keep the canister warm between uses, if permitted. Never heat it over a flame or another external heat source. Do not use a canister that is dented, rusted, or smells of gas. Connect and disconnect canisters away from any flame, and use a windscreen around the pot, not tightly around the canister, unless the stove maker says it is safe.
- Use liquid-fuel stoves with extra care. They handle extreme cold well, but fill and prime them outside only, keep fuel bottles sealed and away from the tent, and clean up spills before you light anything.
- Keep a lighter and matches. Built-in igniters often fail in the cold.
- If anyone feels sudden headache, dizziness, or nausea inside a shelter, get everyone into fresh air at once and call emergency services.
Our camping stoves guide compares models that perform well in cold weather.
12. Warm Up Before Bed and Use a Hot Water Bottle
Get warm before you get into your bag, because a bag only holds heat you bring to it. A short routine around camp can help you feel warm enough before settling in, rather than waiting until you feel the cold, especially after tasks around camp or hanging out at camp in damp clothing. Do a minute or two of light movement, eat your snack, and use the bathroom so you do not have to leave a warm bag at 2 a.m.
Then try these:
- Fill a hard-sided, leakproof bottle made for hot liquids with hot water, wrap it in a sock, and keep it near your core or feet. Check the bottle maker’s instructions before adding boiling water, and never put a hot bottle directly against bare skin.
- Wear dry base layers and a hat, but keep clothing loose so it does not squeeze off circulation.
- Keep tomorrow’s base layer and boot liners in your bag so they are warm and not frozen in the morning.
- Do not breathe into your bag. Moisture from your breath reduces insulation.
- Use a labeled wide-mouth pee bottle so you can stay in the bag on cold nights.
13. Control Condensation
Keep vents partly open and keep wet gear and cooking out of the tent. Your breath adds moisture overnight, and in cold air it turns to frost on the tent walls.
Shake frost off the walls before packing, and dry damp gear when you can. Do not seal the tent shut for warmth. Good airflow cuts condensation, but remember that venting never makes fuel-burning gear safe to use inside. See how to stop tent condensation for more fixes.
14. Keep Water, Fuel, and Electronics From Freezing
Store water bottles upside down, keep filters and electronics warm, and protect anything that must not freeze. This is one practical way to stay warm and comfortable on a winter night, but it does not replace the right sleeping bag and pad. Storing a bottle upside down can help keep the cap area from freezing first, depending on its design and conditions. Keep it insulated and securely sealed.
- Keep your phone and spare batteries in an inside pocket or inside your bag at night. Cold drains batteries fast, and a power bank holds up better when kept warm.
- Keep a water filter warm. Many filters can be damaged by freezing and cannot be trusted afterward. Our camping water filters guide covers options, and boiling is a reliable backup.
- Bring an insulated bottle, or boil water in the evening to fill your hot water bottle.
- When melting snow for water, use clean snow and start with a little water in the pot so it does not scorch; never rely on eating snow alone for hydration.
- For fuel, follow the manufacturer’s instructions to keep the canister warm between uses, if permitted. Keep it away from flames and other external heat sources. At night, store fuel outside your sleeping area in a sheltered spot. If you must bring a canister into the tent to keep it warm, it should be sealed, undamaged, free of leaks, and kept away from any heat source.
15. Know the Warning Signs and When to Turn Back
Turn back or leave camp if anyone is wet and cannot warm up, if someone shows confusion or slurred speech, or if the weather turns worse than forecast. Your first winter trip is a practice run, and there is no prize for staying through a bad night.
Other good reasons to leave include a failed stove, a damaged tent, a missing piece of safety gear, or running out of daylight. Agree on these rules before you leave home. The next two sections explain exactly what to watch for.
Beginner Winter Camping Gear Table
| Item | What to look for | Budget tip | Related guide |
|---|---|---|---|
| Tent | Four-season for snow and wind, or three-season for mild nights | Borrow or rent for your first trip | Choosing a tent |
| Sleeping bag | Comfort rating at or below the expected low, with a margin | Buy for the coldest trip you realistically plan | Cold-weather bags |
| Sleeping pad | R-5 or higher for snow or frozen ground, or stack foam and inflatable | A foam pad under a cheaper inflatable works | Sleeping pads |
| Base layers | Merino wool or synthetic, no cotton | One good set, wash between trips | See tip 5 |
| Insulated jacket | Big enough to fit over your layers | Synthetic holds heat when damp | See tip 5 |
| Boots and socks | Insulated boots with toe room, wool socks | Spare dry socks cost very little | See tip 7 |
| Stove and fuel | Isobutane-propane canisters (not pure butane) or a liquid-fuel stove | Bring extra fuel for melting snow | Camping stoves |
| Headlamp | Bright, with spare lithium batteries | Any reliable headlamp works | Flashlights |
| Water filter or boiling setup | A filter you can keep from freezing, or a pot for boiling | Boiling costs nothing extra | Water filters |
| Safety items | CO alarm as a backup, first aid kit, map, whistle, lighter and matches | Cheap and always worth carrying | Beginner checklist |
Hypothermia and Frostbite: What to Watch For
Both injuries can develop quietly. Cold, wet, and tired people often do not notice their own decline, which is why you watch your camping partners and they watch you.
Hypothermia
Hypothermia is a dangerously low body temperature, and the CDC notes it can happen even above 40°F (4°C) if you are wet from rain, sweat, or cold water.
Early signs in adults: shivering, exhaustion, confusion, fumbling hands, memory loss, slurred speech, and drowsiness. Some outdoor instructors summarize it as the “umbles”: stumbles, mumbles, fumbles, and grumbles. If someone seems clumsy, quiet, or irritable, check on them.
Do not ignore a change. If violent shivering suddenly stops while the person is getting worse, treat it as an emergency, not as an improvement. The CDC says a body temperature below 95°F (35°C) is an emergency that needs medical attention right away.
What to do:
- Call for emergency help as soon as possible, then get the person into shelter out of the wind.
- Remove wet clothing and replace it with dry layers.
- Insulate them from the ground with a pad and warm the center of the body first: chest, neck, head, and groin. Use skin-to-skin contact under dry layers or blankets.
- Give warm drinks only if they are awake and able to swallow.
- Handle them gently. If they stop breathing or have no pulse, begin CPR and keep warming them while you wait for help, as the CDC advises.
Frostbite
Frostbite is freezing damage to skin and the tissue under it, most often on fingers, toes, ears, cheeks, and the nose.
Signs: redness or pain can be the first sign. The CDC lists other signs as white or grayish-yellow skin, skin that feels unusually firm or waxy, and numbness. Because the area goes numb, you may not feel it, so check each other’s faces and hands during the day.
What to do:
- Get out of the cold and seek medical care.
- Check for hypothermia too, because hypothermia is the more urgent emergency.
- Do not rub the area with snow or massage it.
- Avoid walking on frostbitten feet unless you have to, as walking can increase the damage.
- If you are far from help and there is no risk of the area freezing again, you can gently warm it in warm (not hot) water. Never use a stove, fire, or heating pad, because numb skin burns easily.
Prevention: keep skin covered, keep your layers dry, keep your boots loose enough for circulation, and warm your hands and feet before they go numb.
Avalanche and Winter Terrain Safety
Most beginner winter campers will never be near avalanche terrain, but it is worth knowing how to avoid it. Many slab avalanches occur on slopes between approximately 30 and 50 degrees, with a large proportion occurring between 34 and 45 degrees. Dangerous runout can extend onto flatter ground below steep slopes, so do not camp beneath avalanche terrain.
Simple rules for beginners:
- Camp on flat ground and not under or at the bottom of steep slopes, because avalanches can run into flat areas below them (the runout zone).
- Check the avalanche forecast from your regional center before any trip in the mountains. In the U.S., find forecasts at avalanche.org.
- Stay out of avalanche terrain unless you have taken an avalanche course and carry a beacon, probe, and shovel and know how to use them. Gear alone is not safety.
- Watch for warning signs such as recent avalanches, heavy new snow, wind-loaded slopes, and cracking or “whumpfing” sounds in the snow.
- Respect tree wells at the base of snow-covered trees. Deep soft snow can trap a person, so do not travel alone near them.
- Avoid frozen water unless you have confirmed the ice is safe from local sources.
- Learn the terrain from a map before you go. Avalanche.org has a good avalanche terrain tutorial for beginners.
If you plan to camp in the backcountry, take an avalanche awareness course through your regional avalanche center first. If the forecast danger is considerable or higher, choose a different trip.
Winter Camping Troubleshooting
My stove is weak or will not light. A cold canister loses pressure. Warm it with body heat inside your jacket for several minutes, never over a flame, and switch to a blend with plenty of propane or isobutane rather than pure butane. A nearly empty canister performs worse because the propane burns off first, so carry a spare. Use a windscreen around the pot, not tightly around the canister, unless the stove maker says it is safe. Liquid-fuel stoves handle extreme cold better but need careful priming outside. Never move the stove into your tent or vestibule to fix a cold-weather problem. See propane vs butane for fuel basics.
My water is frozen. Thaw a bottle by tucking it inside your jacket or sleeping bag, or by adding warm water from your pot. Never heat a plastic bottle directly over a flame. Keep a hydration hose from freezing by blowing the water back into the bladder after each sip. Next time, store bottles upside down and inside your pack or bag.
My feet are cold. Change into dry socks, eat something, and move around for a minute or two to get blood flowing. Put a warm water bottle in your bag. If it keeps happening, check that your boots are not too tight and that your pad has enough R-value.
I cannot sleep. First check whether your pad is the problem, since cold from the ground is the most common cause. Eat a snack, drink something warm, do a brief burst of light movement, and add a dry layer. If you still cannot warm up, get to your car and heat it, following the tailpipe and engine safety notes in tip 11. Do not tough out a night where you cannot stop shivering.
My gear is damp. Keep the bag and insulation dry, wring out and swap wet socks, and dry items inside your clothing or well away from open flames. Never dry gear with a stove inside the tent.
Common Winter Camping Mistakes
- Picking a trip that is too cold, too remote, or too long for a first try
- Treating one temperature number as “safe” without checking your gear’s ratings, wind, and moisture
- Wearing cotton or sweating through your base layer
- Buying a bag by its limit rating and expecting it to feel warm at that temperature
- Using a low-R-value pad, or no foam under an air pad
- Using a stove, heater, or lantern inside the tent, or thinking a cracked vent makes it safe
- Relying on pure butane canisters in freezing weather
- Ignoring early hypothermia and frostbite signs in yourself or a friend
- Letting water bottles, filters, and phones freeze overnight
- Camping under steep slopes, heavy branches, or on ice
- Skipping the forecast and not telling anyone your plan
Winter Camping FAQs
What do I need for my first winter camping trip?
You need a tent suited to the conditions, a sleeping bag with a comfort rating at or below the expected low, a pad rated R-5 or higher for snow or frozen ground, wool or synthetic layers, insulated boots, a headlamp, a stove with cold-weather fuel, and a first aid kit. A CO alarm is a smart backup near any heated shelter.
How cold is too cold for a beginner?
There is no single number. Your limit depends on your gear’s tested ratings, wind, moisture, how far you are from help, and your experience. A good first-trip approach is a mild forecast at a car-accessible site, with the low comfortably above your bag’s comfort rating and your pad suited to the ground.
How do I stay warm in a tent at night?
Eat a fatty snack before bed, wear dry base layers, use a pad suited to the ground, and put a warm water bottle in your bag. Keep your breath out of the bag, vent the tent slightly to reduce condensation, and never run a stove or heater inside.
What sleeping bag temperature rating do I need for winter camping?
Choose a bag with a comfort rating at or just below the coldest night you expect, and add a margin because forecasts and conditions vary. Check whether a listed number is the comfort or limit rating. Use the bag-and-temperature table above as a starting point, and size up if you sleep cold.
What R-value do I need for winter camping?
For sleeping on snow or frozen ground, many brands and retailers treat R-5 as the starting point. You can reach that by stacking pads, since R-values add up. An R-2 foam pad under an R-3 inflatable pad gives roughly R-5. Check that the rating follows the ASTM F3340 standard.
Can I use a three-season tent in winter?
A three-season tent can work on mild winter nights with no snow load and light wind. It has more mesh and lighter poles, so it handles snow and strong gusts poorly. For snow, heavy wind, or temperatures well below freezing, a four-season tent is the safer choice.
Is it safe to use a stove or heater in my tent?
No. The CDC says camping stoves, heaters, lanterns, and grills should never be used inside a tent or enclosed shelter, because carbon monoxide can build up with no smell. Opening a vent does not make it safe. Cook outside and warm up with layers, a hot water bottle, and a proper pad.
Which stove fuel works best in cold weather?
Canister blends with more propane or isobutane work better in the cold than pure butane. Propane boils at about -44°F (-42°C), isobutane at about 11°F (-12°C), and n-butane at about 31°F (-1°C). Even good blends weaken as the canister cools or empties, so keep canisters warm and carry a spare.
What should I wear winter camping?
Wear three layers: a wool or synthetic base layer, an insulating mid layer like fleece or a puffy jacket, and a waterproof, windproof shell. Add insulated boots, wool socks, a warm hat, and mittens. Avoid cotton, because it holds moisture, and take layers off before you sweat.
How do I keep my water from freezing?
Store bottles upside down so the cap does not freeze first, and keep them insulated inside your pack or bag overnight. Fill a bottle made for hot liquids with hot water in the evening to use as a warmer. Keep filters and hydration hoses warm too, because freezing can damage them.
Can beginners go winter camping alone?
It is better to go with an experienced friend on your first trips. Winter mistakes have bigger consequences, and cell service can be unreliable. If you do go alone, stay close to your car, share your plan and turn-around time, and read our guide on is camping alone safe.
How do I know if I am getting hypothermia?
Early signs include shivering, exhaustion, confusion, fumbling hands, memory loss, slurred speech, and drowsiness. If shivering stops while a person is getting worse, treat it as an emergency. Get them out of wet clothing, into shelter, insulated from the ground, and call for medical help.
How This Guide Was Researched
This guide is a research-based how-to, not a field test of specific products. I did not test the gear categories described here, and product-specific picks live in the linked CampingSaga guides, which explain how each pick was chosen.
- Safety claims (hypothermia, frostbite, carbon monoxide, avalanche terrain) come from the CDC, the U.S. Consumer Product Safety Commission, the National Park Service, and avalanche.org, and were checked against those sources on November 10, 2026.
- Gear specifications (sleeping bag rating types, pad R-values, and canister fuel boiling points) follow the ISO 23537 and ASTM F3340 standards and manufacturer documentation, including Sea to Summit and MSR (Cascade Designs).
- General camping practice (layering, sleep tricks) reflects widely shared outdoor guidance. Where something is a rule of thumb and not a rule, the text says so.
- This is not medical or rescue advice. In an emergency, call your local emergency number.
Sources and Further Reading
- CDC: Preventing Hypothermia and Frostbite
- CDC MMWR: Carbon Monoxide Poisoning Deaths Associated with Camping
- CPSC: Portable Heaters and Camping Equipment
- Avalanche.org: Avalanche Terrain
- National Park Service: Avalanche Danger (Mount Rainier)
- Sea to Summit: What Is an R-Value?
- MSR (Cascade Designs): The Ins and Outs of Canister Fuels
Conclusion: Start Small, Stay Dry, Stay Safe
Your first winter camping trip does not need extreme gear or extreme conditions. Pick a short car-camping trip, layer for sweat control, build a sleep system with a properly rated bag and a pad suited to the ground, keep every flame outside the tent, and know the early signs of hypothermia and frostbite.
When you are ready to buy, start with the biggest comfort gains: a good pad, a properly rated bag, and layers. Our cold-weather sleeping bag and tent buying guides are good next steps.
About the author: Ricky Thorne writes camping gear guides and how-tos for CampingSaga. Content last reviewed: November 10, 2026. Spot an error or an outdated detail? Contact us through the CampingSaga contact page and we will review and correct it.