
You arrive at the campsite, the light is fading, the burgers are readyand the can opener is still sitting on your kitchen counter. Most campers have had a moment like this.
This camp kitchen checklist helps you avoid those last-minute packing mistakes. It covers 25 practical checklist items for car camping, from your stove, fuel, and cookware to food storage, cleanup supplies, and water. Each item is grouped by task so you can pack your camp kitchen quickly and systematically. A few lines combine small related pieces such as a lighter and waterproof matchesto keep the checklist practical rather than artificially splitting every small tool into a separate item.
Start with the master checklist, then use the detailed sections below to decide what you actually need, what you can skip, and how to build a simple, organized camp kitchen for your next trip.
Quick Answer: What Belongs on a Camp Kitchen Checklist
- Stove and fuel: a camp stove, fuel and a lighter
- Cookware and utensils: a pot, a pan, a kettle, prep gear and openers
- Dishes: plates, bowls and cutlery
- Cooler and containers: a cooler, airtight containers and foil
- Cleanup: a wash basin, soap, a scrubber, towels and liners
- Water: a jug and a way to treat it
Quick answer: A complete setup has six essential parts.
Fastest way to pack: keep everything except the cooler and the fuel in one dedicated bin.
What this means for you: you do not need a fancy setup. You need all 25 checklist items in one place, so nothing gets left at home.
The Master Checklist: 25 Camp Kitchen Essentials at a Glance
Print this 25-item camp kitchen checklist, tape it inside your kitchen bin, and check each item as you load the car. Keep the baseline list together; adjust only when your menu, group size, or campsite requires it.
Download the Free Printable PDF →
Packing Priority
- Must-have Core gear needed for your planned meals and cooking setup.
- Trip-dependent Bring it when your group size, menu, water source, or campsite requires it.
- Optional Comfort, convenience, or upgrade gear that is not essential to the basic setup.
Quick packing rule: The 25-item list is your baseline. Use the detailed sections below to decide what you can skip, combine, or upgrade.
🔥 Stove & Fuel
- 1. Camp stove
- 2. Fuel canisters
- 3. Lighter + waterproof matches
🍳 Cookware
- 4. Pot with lid
- 5. Pan or skillet
- 6. Kettle or coffee pot
🔪 Prep & Cooking Tools
- 7. Cutting board
- 8. Sharp knife
- 9. Tongs
- 10. Spatula + cooking spoon
- 11. Can opener + bottle opener
🍽️ Dishes & Cutlery
- 12. Plates + bowls
- 13. Cups + mugs
- 14. Forks, spoons + knives
🧊 Cooler & Food Storage
- 15. Cooler
- 16. Airtight food containers
- 17. Heavy-duty aluminum foil
🧽 Cleanup
- 18. Wash basin
- 19. Camp dish soap
- 20. Scrubber
- 21. Dish towels
- 22. Trash bags
💧 Water & Organization
- 23. Water jug
- 24. Water filter or purification tablets
- 25. Lidded storage bin
How to Use This List for Car Camping
The 25 items are grouped by the job they do, not by store aisle. Work through one group at a time and you will not skip anything.
The list is written for drive-up sites, where reliability matters more than pack weight. Scale it with your group size. This table is a starting point for a weekend camping trip, and it includes one spare of each dish item for the plate that always gets dropped.
| Item | 2 people | 4 people | 6 people |
|---|---|---|---|
| Pots (3 to 4 quarts) | 1 | 1 to 2 | 2 |
| Pan or skillet | 1 | 1 | 2 |
| Plates and bowls | 3 each | 5 each | 7 each |
| Insulated cups | 3 | 5 | 7 |
| Forks and spoons | 3 | 5 | 7 |
What Changes by Trip Length
| Trip length | Keep the standard kit | Add or change |
|---|---|---|
| 1 night | Yes | Pack only the food and fuel you need; keep cleanup gear and the water setup unchanged. |
| 2 nights | Yes | The standard 25-item kit works for most car-camping setups. |
| 3+ nights | Yes | Add fuel, trash liners and food-storage capacity before adding extra cookware. |
On a longer camping trip, add fuel and liners first. Extra gear rarely helps.
Camp Stove and Propane: Your Cooking Setup
Two-Burner Coleman-Style Stoves
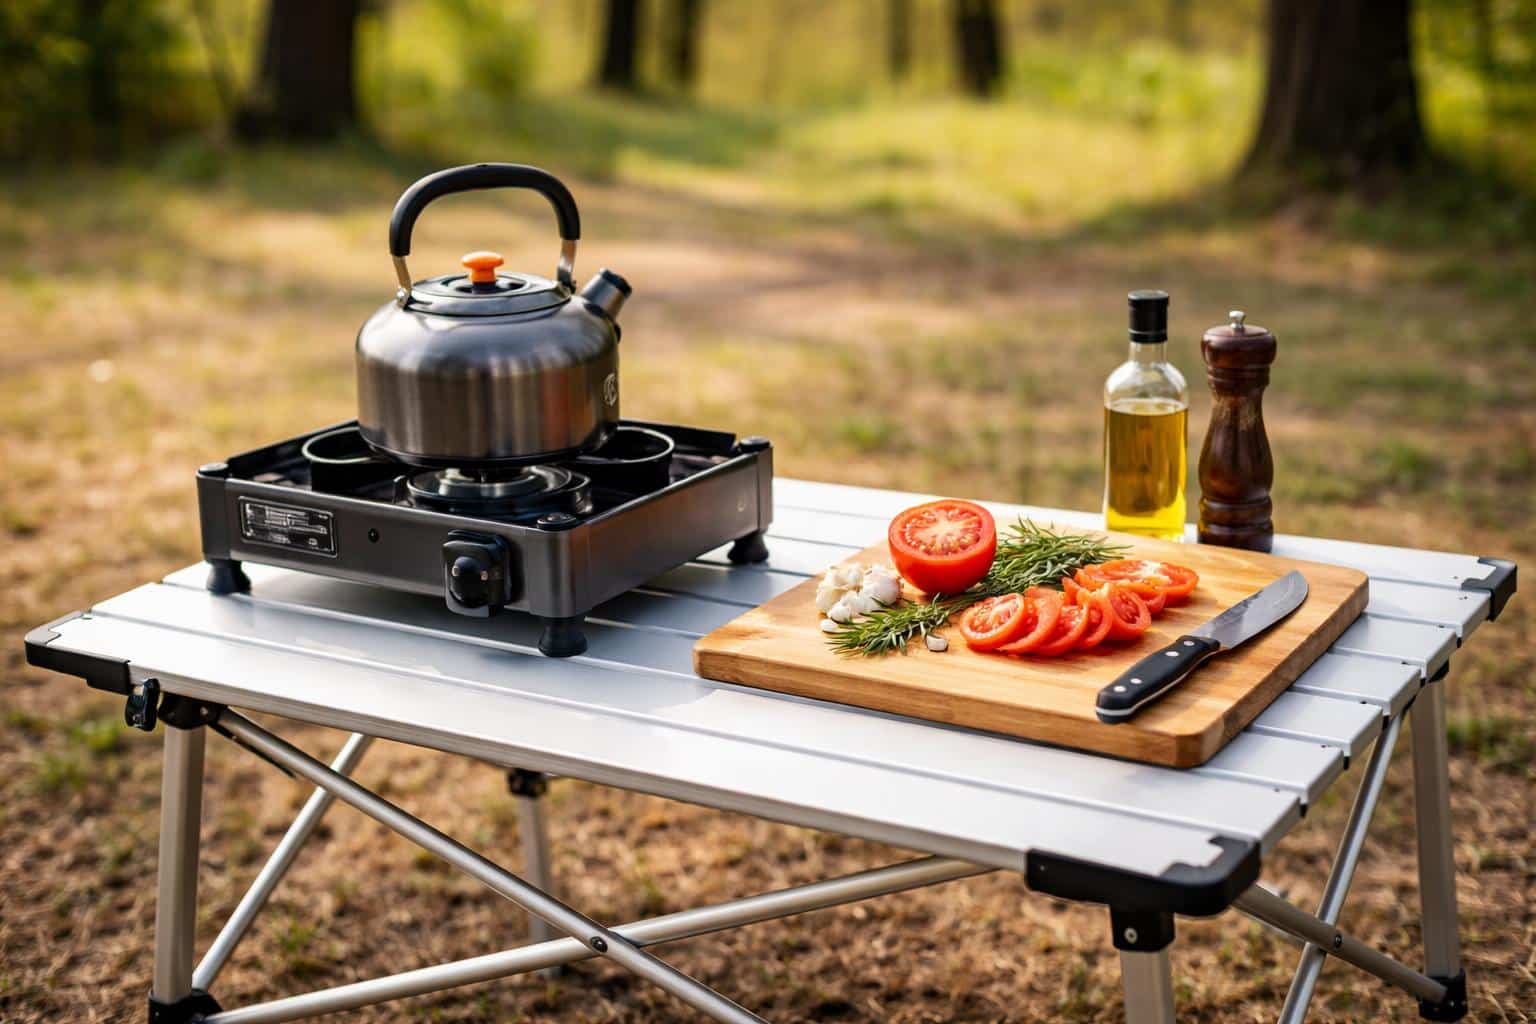
- Camp stove. For car trips, a two-burner stove is a practical choice. It holds a pot and a pan at once and sits steady on a table. If you are comparing models, see our best camping stoves guide. Pick one with a built-in wind guard, or bring a folding windscreen. Wind can reduce burner efficiency and make cooking slower.
Ricky’s field note: I set up first with the wind guard facing the breeze, and I level the pot before I light anything. A tilted pot heats unevenly and spills.
- Fuel canisters. Most two-burner models run on 16.4-ounce fuel cylinders. Pack one more than you expect to use. Before each trip, check the hose and connection for cracks, then brush soapy water on the joints. Bubbles mean a leak, so replace the part before you cook.
- Lighter and waterproof matches. Built-in igniters fail. Keep a lighter and matches in a sealed bag for fire starting, plus a spare lighter in the bin. If your site allows an open fire, the same kit lights it.
Cookware and Cooking Utensils
These eight essential pieces do the real camp cooking. Buy durable pieces, go lightweight where it is cheap to do so, and stop there. If you want a matched set, see our best camping cookware sets guide.
Pots, Pans and Camp Coffee Gear
- Pot with lid. A 3 to 4-quart pot in aluminum or stainless steel handles pasta, chili and boiling water. A lid speeds heating and saves fuel.
- Pan or skillet. One 10 to 12-inch pan covers eggs, burgers and pancakes. Cast iron holds heat well and can last for decades, but it is heavy and needs drying and oiling after washing. See our guide to cast iron skillets for camping if you want that style. A non-stick pan is fine for most meals. Whatever you pick, choose pots and pans that nest together to save space.
- Kettle, coffee maker or percolator. A plain kettle covers coffee or tea, oatmeal and hot cocoa. If you want a proper morning pot, any stovetop coffee pot works on the same burner. For more options, see our best camping coffee makers guide.
Prep Tools, Cutting Board and Cooking Equipment
You will reach for these tools at every meal. Choose heat-safe pieces that are easy to clean.
- Cutting board. A thin flexible board packs flat and washes fast.
- Sharp knife. One good utility knife with a sheath beats a drawer of dull ones.
- Tongs. They handle hot pans, sausages and coals.
- Spatula and spoon. Silicone or nylon will not scratch your pans.
- Can opener and bottle opener. These are the classic forgotten items. Keep small kitchen items like openers and lighters in one zip pouch with a permanent home in the bin.
Lightweight, Easy-to-Clean Camp Dishes and Cutlery
Skip disposables at camp. Reusable dishes cost little, make less trash and survive rough handling.
- Plates and bowls. Choose lightweight plates and bowls that stack, such as melamine or enamel-coated steel. Look for dishes that are durable and lightweight, and avoid thin plastic that cracks in the cold.
- Cups and mugs. Insulated mugs keep coffee hot and cold drinks cold. Bring one per person plus a spare.
- Cutlery. Give each person a fork, spoon and knife, or a spork plus one shared serving spoon.
Nesting sets are easy to pack and quick to wash. A set that lives in the bin is a set you will never forget. If you prefer an all-in-one option, compare camping mess kits.
Food Storage and Coolers for the Campsite
Food safety and wildlife control both come down to how you handle your cold food and your trash. Get these three items right and most food problems disappear.
Choosing and Packing a Cooler
- Cooler. Pick a cooler with thick walls and tight latches. Pre-chill it overnight, load cold food first and fill air gaps with ice. Keep it in the shade and drape a light-colored blanket over it to insulate it from the sun. Keep raw meat sealed and on the bottom so juices never touch other food.
Keep perishable items cold. The USDA advises holding cold food at 40°F or below and not leaving it out for more than 2 hours, or 1 hour when it is above 90°F (USDA FSIS). A cheap appliance thermometer inside the cooler tells you for sure.
Pack non-perishable items such as canned beans, pasta and oats in a separate dry bin, so the cooler only carries what truly needs the cold.
Ricky’s field note: If there is room, I bring two coolers: one for drinks that gets opened all day, and one for food that stays shut.
Airtight Containers and Foil
- Food containers. Airtight, stackable containers keep bugs out and are ideal for storing leftovers and prepped meals.
- Aluminum foil. Heavy-duty foil wraps food, lines a dirty pan and cooks a foil-packet dinner over coals.
Wildlife rules vary by park and campground. The National Park Service treats food, trash, coolers, dirty stoves and dishes the same way: store them in a locker or a locked hard-sided vehicle when you are not using them (NPS). Check the posted rules at your site.
Camp Kitchen Cleanup and Water
Easy-to-Clean Camp Kitchen Setup
- Collapsible sink or wash basin. A collapsible sink keeps soapy water contained and folds flat in the bin. See our best portable camping sinks guide if you want a dedicated camp sink.
- Biodegradable soap. Use a small amount, and never wash in a stream or lake. Carry water at least 200 feet (about 70 adult steps) from water sources, strain out food bits, then scatter the dishwater (Leave No Trace).
- Scrubber. A non-scratch scrubber handles stuck food without ruining your pans.
- Dish towels. Bring two: one for drying and one for wiping hands and the table.
- Trash bags. Pack more than you think you need. Pack out all trash, food scraps and litter.
Ricky’s field note: I wash up before dark, every time. Dirty pans, food scraps and lingering food smells can attract wildlife, so the kitchen is clean and packed away before I sit down by the fire.
Water: Filter, Purification Tablets and Staying Hydrated
- Water jug. A large jug with a spigot gives you clean water for drinking, cooking and washing without repeated trips to the tap.
- Water filter or tablets. If you gather water from a stream or lake, treat it every time. Boiling is the most reliable method: a rolling boil for 1 minute, or 3 minutes above 6,500 feet (CDC). Portable filters vary widely: some are designed to remove protozoa and bacteria, while many do not remove viruses. Check the product’s stated or certified capabilities and follow the maker’s directions. Tablets are a light backup.
Hydration matters more than most people plan for, especially in heat. Bring more water than your meal plan suggests. More on treatment options in the CDC guide for camping and travel.
Keep Your Camp Kitchen Organized
- Lidded bin. One sturdy, lidded bin turns 24 loose items into one grab-and-go kit. It doubles as a table for the stove in a pinch, and it keeps mice and dust out between trips.
Build one kit and leave it packed. Tape your checklist to pack against the inside of the lid, then restock your camping supplies after every trip: refill the soap, swap the fuel and replace anything you used up. Keep the kit’s contents on a short list of camping gear you can tick off in two minutes.
At the campsite, set up the kitchen well away from your sleeping area, and never store food in the tent. Picking a good spot makes this much easier, and our guide to choosing the perfect campsite covers what to look for. Portable camping gear like a folding camping table also helps, since it keeps the stove off the ground.
Camp Stove vs Campfire vs Portable Grill
Every style of outdoor cooking has trade-offs. This table compares the three most common.
| Method | Best for | Pros | Cons | Gear needed |
|---|---|---|---|---|
| Two-burner stove | Everyday meals, boiling water, bad weather | Precise heat, fast setup, works when fires are banned | Needs fuel, limited surface | Fuel, pot, pan, lighter |
| Campfire | Roasting, slow cooking, atmosphere | No fuel purchase, great flavor | Uneven heat, slow, banned in dry seasons | Firewood, fire starter, foil |
| Grill | Burgers, steaks, vegetables | Good char, even heat | Bulky, needs charcoal or gas | Grill, fuel, grill tools |
What this means for you: a two-burner setup provides a more predictable primary cooking method than relying on a campfire. Add a campfire when conditions and local rules allow it, rather than making it your only cooking plan.
Two optional upgrades are not part of the 25: a camping dutch oven for slow-cooked stews and portable camping grill for searing. Both add weight and cleanup, so buy them only after you have used the basics for a few trips.
Camp Kitchen Changes for Backpacking and Other Trip Types
This list assumes you can carry gear from the car. For a broader comparison of vehicle-based setups, see our car camping vs. tent camping guide. For a trail trip, swap the two-burner for a small single-burner stove, take one small pot, one spork and a filter, and leave the skillet and cooler at home.
For family trips, add a second pot, a bigger cooler and more water. If you also need shelter and seating, our 19 family camping tips cover the broader setup. If you camp with a camper or trailer, you can pull most items from your home kitchen and skip the bin.
Building the kit from scratch? Borrow from your home kitchen first. Our guides to camping on a budget and budget camping gear worth buying show where to spend and where to save.
How to Pack Your Camp Kitchen: Steps and Decision Tree
- Lay out every item on the checklist and tick it off.
- Wash and dry everything before it goes in the bin.
- Nest your cookware, and pack small dishes inside it.
- Wrap the knife in its sheath and the board flat against the lid.
- Pack cleanup gear last so it comes out first after dinner.
- Load the cooler the morning you leave, cold food first.
- Stand fuel canisters upright in the car, away from heat.
Decision tree: what should you add or skip?
- Cooking for more than four people? Yes: add a second pot and a second pan. No: keep one of each.
- Fire ban or high wind expected? Yes: cook on the burner only, and skip fire tools. No: add foil and fire-safe gloves for fire cooking.
- Staying more than two nights? Yes: add a spare fuel canister and extra liners. No: the standard 25-item kit is enough.
- Will you gather water from a stream or lake? Yes: bring a filter and tablets. No: a full jug is enough.
Common Camp Kitchen Mistakes
- Packing loose. Gear scattered across the car gets forgotten. Fix: one bin, one list.
- Trusting the igniter. Fix: carry a lighter and matches every trip.
- Running out of fuel. Fix: pack one more canister than you plan to use.
- Leaving the cooler in the sun. Fix: shade, blanket and a tight lid.
- Washing dishes at the water’s edge. Fix: carry water 200 feet away and scatter strained dishwater.
- Overspending on gadgets. Fix: master the 25 checklist items first, then upgrade one piece at a time.
- Leaving food out overnight. Fix: store food and trash as the campground requires.
Camp Kitchen Safety Warnings
- Carbon monoxide: never use a camping stove, lantern or charcoal grill inside a tent, trailer or other enclosed shelter, and do not assume open flaps make it safe (CDC). Specialized hot-tent setups exist, but they use purpose-built stove jacks; see our hot tent camping guide before trying one.
- Food temperature: keep cold food at 40°F or below, and discard food left out more than 2 hours (1 hour above 90°F) (USDA FSIS).
- Water: treat stream and lake water. Boil for 1 minute, or 3 minutes above 6,500 feet (CDC).
- Dishwater and trash: strain and scatter dishwater at least 200 feet from water sources, and pack out all food waste (Leave No Trace).
- Wildlife: follow local rules for storing food, coolers and cookware in lockers or locked vehicles (NPS).
- Stoves and fuel: run it on a stable, level surface, never leave it lit and unattended, and keep fuel canisters away from the flame.
Camp Kitchen Checklist FAQ
What should be in a camp kitchen?
A stove and fuel, a pot and pan, a knife and cutting board, dishes, a cooler with airtight containers, cleanup gear and a safe water supply. The master list above covers all 25 checklist items.
How do you organize a camp kitchen?
Use one lidded bin for everything except the cooler and fuel. Group items by task, tape the checklist inside the lid, and restock after each trip.
What cooking gear do I need for camping?
A two-burner stove, fuel, a 3 to 4-quart pot, a skillet, a spatula, a knife, a cutting board and a can opener cover most meals for a weekend trip.
How do you keep food cold while camping?
Pre-chill the cooler, pack cold food first, fill air gaps with ice, keep it shaded and closed, and check it stays at or below 40°F with a thermometer.
Do I need a stove if I have a campfire?
Yes. Fires can be banned in dry seasons, and stoves give steadier heat for boiling water and quick meals. Treat the fire as a bonus.
How do you wash dishes while camping?
Scrape food into the trash, wash in a basin with a little biodegradable soap, and rinse with clean water. Strain the dishwater and scatter it at least 200 feet from water sources.
What should I skip?
Skip duplicate pots, bulky appliances and single-use gadgets. Add a dutch oven or grill only after you have used the basics for a few trips.
Final Thoughts on Your Camp Kitchen Checklist
A well-organized camp kitchen isn’t about bringing more gear it’s about having the right essentials packed and ready to go. Keep these 25 checklist items together in one dedicated bin, restock supplies after each trip, and adjust the setup to match your menu, group size, and campsite.
When the stove and fuel, food storage, water, and cleanup gear are handled, the rest becomes much easier. A simple, repeatable packing system means less time searching for forgotten gear and more time enjoying a good meal around the campsite.
Next step: print the checklist and pack your bin the night before your next camping trip.
2 thoughts on “Camp Kitchen Checklist: 25 Essentials for Car Camping (2026)”