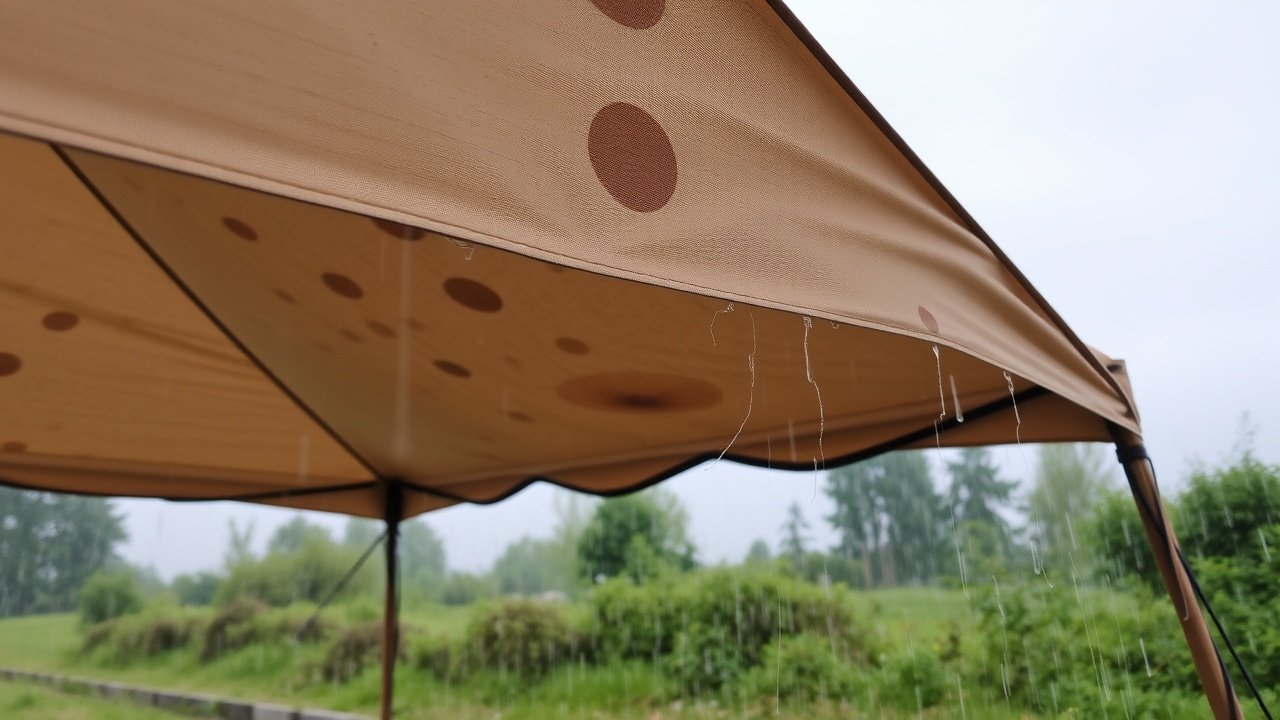
I’ll never forget the night my “waterproof” canvas gave up the ghost during a freak storm in the Cascades. One minute I was bone-dry; the next, I was waking up to a cold, rhythmic drip hitting my forehead, reminding me of the need to waterproof my tent. It’s a miserable way to learn a lesson. Canvas is a beautiful, breathable beast, but it’s only as good as the closure you give it.
Look, the truth is that knowing how to waterproof a tent has changed with the new fabric blends hitting the market this season. We aren’t just slathering wax on everything anymore; we now use advanced water-resistant methods like polyurethane sprays. If you’re looking for canvas tent hacks for 2026 include tips on how to waterproof a canvas tent efficiently., you need to focus on modern polymer sprays that don’t choke the fibers.
Here’s the kicker: many people jump straight to the expensive stuff, but finding the best budget tent sealant for beginners can actually save your gear from the common tent waterproofing mistakes to avoid, like over-coating and ruining the breathability. I’m going to show you how to get that factory-level secure in under an afternoon. I’ve spent the last decade in the mud so you can stay dry. We’re stripping away the fluff and getting straight to the grit of keeping the rain out.
Let’s get your gear ready for the season with effective tent waterproofing treatments.
Understanding Tent Waterproofing
Understanding the fundamental principles of tent waterproofing is crucial for any outdoor enthusiast, ensuring your shelter remains impervious to the elements. It’s not just about applying a waterproofing product; it involves a comprehensive approach to maintain the integrity of your tent fabric and seams.
A properly water-resistant tent provides a durable barrier against rain and dew, allowing you to enjoy the natural beauty of your surroundings without the worry of moisture ingress. This proactive maintenance extends the life of your tent, making it a valuable investment for many years of use.
Why New Tents Still Leak
It might seem counterintuitive, but even a new tent can leak, leading to a damp and uncomfortable camping trip. Manufacturers often apply an initial water-resistant coating, but this isn’t always foolproof or sufficient for all conditions. Tiny holes, inherent in the manufacturing process where joints are stitched, or inadequately sealed stitch tape, can allow water to penetrate the fabric. Furthermore, while the fabric itself may be water-resistant, areas subject to high tension or frequent folding can develop vulnerabilities over time, compromising the overall waterproof integrity and causing unexpected leaks during the first downpour.
Identifying Leaks with the Water Bead Test
To accurately identify leaks in your tent, the Water Bead Test is an indispensable diagnostic tool. Begin by setting up your tent in a dry, open area, preferably on a sunny day to ensure good visibility. Using a garden hose, gently spray water evenly over the exterior of the tent, focusing on the rainfly, joints, and floor to check if the tent is still waterproof.
Observe how the water interacts with the fabric; healthy waterproofing will cause water to bead up and roll off. Areas where the water soaks into the fabric, rather than beading, indicate a compromised water-resistant coating or DWR (Durable Water Repellent) layer, pinpointing exactly where your tent needs a refresh or restore.
Common Pain Points in Tent Waterproofing
Beyond simple leaks, several common pain points can compromise your tent’s waterproofing and overall functionality, highlighting the need to waterproof it regularly. Peeling stitch tape, often found on older or heavily used synthetic tents, creates obvious entry points for water, requiring immediate fix.
Sticky zippers, while not directly related to waterproofing, can become a persistent nuisance in damp conditions, impairing quick entry and exit. Mildew, a result of packing a damp tent, can degrade the fabric and its water-resistant coating over time, necessitating a thorough tent clean and re-treatment. Addressing these issues proactively is vital to keep your tent in prime condition.
The 3-Part Waterproofing System
Seam Sealing: Step-by-Step Guide
Effective stitch sealing with seam tape is a critical component of any comprehensive tent waterproofing strategy., directly addressing the vulnerable areas where fabric panels are joined. Even a new tent can leak through poorly sealed joints, necessitating this essential waterproofing treatment.
To begin, set up your tent on a sunny day to ensure the seams are dry and taut, as the waterproofing needs to dry thoroughly. Carefully inspect all tent joints, especially those on the rainfly and floor, for any signs of peeling stitch tape or missed stitching. Apply a specialized joint sealer, often a polyurethane-based product, in a thin, even bead directly along the stitch from the underside of the fabric. Allow ample time for the sealant to dry completely, which is crucial for a durable and lasting restore.
Sealing Tent Seams
While the fabric of your tent may be waterproof, the seams (where the panels are stitched together) are the most common failure points. Even a high-end tent can leak if the seam tape has begun to peel or if the factory seal has degraded.
- Prep the Surface: Set up your tent on a sunny day so the fabric is taut. Use a cloth and a little rubbing alcohol to clean the interior side of the seams. This ensures the seam sealer bonds perfectly to the fabric.
- Identify the Type of Sealer: * For Polyurethane (PU) coated tents, use a water-based urethane sealant.
- For Silnylon tents, you must use a silicone-based sealer.
- Apply the Sealant: Lay a thin, even bead of sealer over the stitching on the inside of the tent. Use a small brush or sponge to work the liquid into the thread holes.
- Let it Cure: This is where most people fail. You must let the sealant dry completely (usually 12–24 hours) before packing the tent away. If you pack it wet, the seams will stick together and ruin the protective coating.
Refreshing DWR Coating on Synthetic Tents
The Durable Water Repellent (DWR) coating on synthetic tents is what causes water to bead up and roll off, preventing the fabric from soaking through. Over time, exposure to UV rays, dirt, and abrasion degrades this coating, reducing its effectiveness and leading to a damp interior during a camping trip. To refresh your tent’s DWR, first perform a thorough tent clean, removing all dirt and mildew.
Once the tent is clean and dry, set up your tent outdoors on a sunny day. Apply a high-quality waterproofing spray specifically designed for synthetic fabrics, ensuring even coverage, and consider using a water-based polyurethane for added protection. over the entire rainfly and tent body. Allow the tent to air dry completely, as this process helps to bond the new protective coating to the fabric, restoring its water-resistant properties and extending its years of use.
Seasoning Your Canvas Tent
Seasoning a canvas tent is a unique and vital waterproofing treatment that prepares the canvas material to be truly water-resistant. Unlike synthetic tents that rely on coatings, canvas tents achieve their water resistance through a natural process. When a new canvas tent gets wet for the first time, the fibers in the canvas absorb water and swell, effectively sealing the tiny holes in the weave and preventing leaks.
To properly water-resistant a canvas tent, set up your tent and thoroughly soak it with a garden hose on a sunny day. Allow the tent to dry completely. This wet-and-dry cycle may need to be repeated two or three times to ensure all seams and fabric are fully seasoned. This natural seasoning process makes the canvas material incredibly durable and ensures you stay dry on all future camping trips.
How to Waterproof Your Tent with Nikwax
Waterproofing a camping tent with Nikwax is an effective, environmentally friendly way to restore water repellency and extend your tent’s life. This guide shows when to treat, which Nikwax products to use, and step-by-step application for best results.
When to Re-waterproof Your Tent
- Rain beads on the fabric surface? Not fully repellent time to treat.
- Flat wet patches, seam leakage, or damp inside after heavy rain = immediate reproofing needed.
- After regular use, UV exposure, or washing, reapply every 1–2 seasons depending on conditions.
What You’ll Need
- Nikwax Tent & Gear SolarProof or Nikwax TX.Direct Spray-On (for synthetic tents)
- Nikwax Tent & Gear SolarProof Cleaner (if fabric is dirty)
- Soft brush or sponge, clean towel
- Plastic drop sheet or clean surface
- Well-ventilated space or outdoors in dry weather
Choosing the Right Nikwax Product
For tents, Nikwax offers a few options:
- Nikwax Tent & Gear SolarProof – restores waterproofing and UV protection for durable outer fabric; recommended for prolonged protection.
- Nikwax TX.Direct Spray-On – restores DWR (durable water repellent) finish for breathable fabrics and maintains breathability.
- Nikwax Tech Wash – use before reproofing if the tent is dirty; it cleans without leaving residues that block water repellency.
How to Waterproof a Camping Tent with Nikwax
- Pitch or lay out the tent choose a clean, flat surface and set the tent up or spread it out fully to access all fabric panels.
- Clean the tent if needed mix Nikwax Tech Wash with warm water per instructions, gently scrub dirty areas with a soft brush or sponge, rinse thoroughly and let the tent dry completely. Do not use detergents.
- Protect surrounding surfaces place a drop sheet beneath or work outdoors to avoid overspray.
- Apply Nikwax product shake the bottle, spray evenly from about 15–25 cm (6–10 in) across the outer fabric. For seams, use a steady sweep to cover stitch lines; avoid saturating inner breathable membranes. Follow label coverage guidance.
- Work in sections ensure uniform coverage: fly, vestibules, and rainfly first, then doors and other exposed panels. Let excess product settle briefly and re-spray any dry patches.
- Dry thoroughly allow the tent to dry naturally in shade or a well-ventilated area. Avoid direct high heat. Some Nikwax products activate on drying; follow drying time on the bottle (often a few hours to overnight).
- Check seams and zippers if seams leak, consider applying Nikwax Seam Grip (or a seam sealer compatible with your tent) to stitched areas after waterproofing and drying.
- Reassemble and test once dry, pitch the tent and sprinkle water to confirm beading. Reapply lightly if areas still wet out.
Tips for Best Results
- Always follow the Nikwax product instructions printed on the bottle for dilution, application distance, and drying.
- Test a small inconspicuous area first to ensure compatibility, especially on older or coated fabrics.
- Avoid using household detergents; they remove the DWR finish and shorten waterproof life.
- Store treated tents clean and dry to maintain the waterproof coating longer.
Maintenance Schedule
For regular campers: clean lightly after muddy trips and reapply Nikwax products once the tent shows reduced beading or annually before the wet season. For heavy use or harsh conditions, check every few months.
Waterproofing Products for Canvas Tents
To build a high-converting affiliate section, you need to provide the technical details that help a buyer decide quickly. Here are 5 Amazon products for your canvas waterproofing section with the specs and trade-offs required for a professional review.
1. Star Brite Waterproofing with PTEF
The premium choice for large-scale canvas protection.
- Specs: High-tech polymer formula; available in 22oz spray or 1-gallon jugs; safe for all outdoor fabrics.
- Pros: Does not change the color or “breathability” of the canvas; provides a barrier against UV rays and bird droppings.
- Cons: Higher price point per gallon; requires a completely dry surface for the bond to work.

- ULTIMATE WATERPROOFING FOR OUTDOOR FABRICS – Designed for use on boat covers, car covers, bimini tops, sail covers, tent…
- PRESERVES FABRIC QUALITY – Does not change the breathability, color, or feel of fabric, ensuring original texture and ap…
- EXTENDS FABRIC LIFE – Ideal for use on new fabrics to help prolong their service life and revitalizes older fabrics by p…
2. Nikwax Tent & Gear SolarProof
The best “all-in-one” maintenance spray for environmentally conscious campers.
- Specs: Water-based, non-flammable, and PFC-free; adds DWR and UV protection in one application.
- Pros: Can be applied to wet fabric, saving you time during a multi-day cleaning process; environmentally friendly.
- Cons: The spray nozzle can sometimes clog; may require two coats for older, highly porous canvas.

- The only waterproofer designed to protect against UV damage and enhance water repellency of all weatherproof textiles.
- Easy to use concentrated waterproofing and UV blocker for all synthetic tents, backpacks and panniers
- Adds water repellency, increases fabric strength
3. Gear Aid Seam Grip TF (Tent Fabric)
The surgical tool for fixing persistent leaks in your tent’s “joints.”
- Specs: Polyurethane-based liquid sealant; comes with a built-in applicator brush.
- Pros: Dries into a clear, flexible, and permanent rubber-like seal that won’t crack in the cold.
- Cons: Takes 8 to 12 hours to cure fully; once the tube is opened, the shelf life is relatively short.

- Permanent Repairs – Seal seams and fix holes in tents, tarps, awnings, rainflies, and gear like Thermarest sleeping pads…
- Covers 12 Feet of Seams – One 1 oz tube treats up to 12 feet of seams or patches torn fabric: 8 oz size also available f…
- Durable & Flexible Seal – Cures into a rubber seal that flexes with fabric, bonds to nylon, polyester, canvas, leather, …
4. Kiwi Camp Dry Heavy Duty Water Repellent
The go-to budget option for a quick refresh before a weekend trip.
- Specs: Silicone-based aerosol spray; specialized for heavy-duty fabrics and leather.
- Pros: Very affordable and widely available; the aerosol allows for a very fine, even mist.
- Cons: Strong chemical odor during application; silicone can slightly reduce the natural breathability of high-end canvas.

- Ideal for tents, tarps, boots, hunting apparel, outdoor gear, boat covers, and patio furniture.
- Keeps water out, allows material to breathe.
- Silicone bonds to leather/fabric to create an extremely tough water barrier, while still allowing article to breathe.
5. Nikwax Tech Wash
The essential first step to ensure your expensive waterproofing actually sticks.
- Specs: Soap-based cleaner; removes dirt and previous coating residues without damaging the fabric.
- Pros: Restores the “water-hating” properties of the original fabric better than standard detergents.
- Cons: Not a “stain remover” for deep grease; you will need a lot of water to rinse it thoroughly out of thick canvas.

- Safely cleans technical synthetic outerwear without damaging DWR (waterproofing treatment). Household detergents leave b…
- Easy to use wash-in technical cleaner that cleans effectively, restores water repellency and revives breathability by re…
- Nikwax products are PFAS-free, water based, non-persistent, and contain no optical brighteners or added scent; machine w…
Choosing the Right Waterproofing Products
Selecting the appropriate waterproofing products for canvas tents is paramount to ensuring a durable and leak-free shelter for your camping trip. Unlike synthetic tents, canvas material benefits from specific treatments designed to work with its natural fibers, making it essential to reproof regularly. For effective canvas tent waterproofing, look for specialized waterproofing solutions that penetrate the fabric without compromising its breathability.
These products often contain wax or silicone-based formulas that enhance the canvas’s natural water-resistant properties, helping it to bead water and prevent moisture from soaking through. Always choose products that are compatible with canvas to avoid damaging the fabric or hindering the natural seasoning process that makes your canvas tent truly water-resistant, including water-based options.
Applying Coatings for Maximum Protection
To achieve maximum protection and keep your tent dry for years of use, applying waterproofing coatings to your canvas tent requires careful attention to detail. After a thorough tent clean to remove any dirt or mildew, apply a diluted waterproofing treatment for optimal results. ensure your canvas material is completely dry, ideally on a sunny day, to maximize the length of time it stays waterproof.
Using a sponge or a garden hose with a fine spray nozzle, apply the chosen waterproofing product evenly across the entire exterior of the tent, focusing on areas prone to wear like the rainfly and tent joints, is part of a step by step approach to maintaining your tent. Allow each coat to dry completely before applying additional layers, if recommended by the manufacturer.
This systematic treatment creates a durable water-resistant coating that helps your tent withstand even the most challenging outdoor conditions, preventing any leak from ruining your camping trip with effective tent waterproofing treatments.
Using Sealants and Tapes Effectively
While canvas tents primarily rely on seasoning and specialized coatings for waterproofing, sealants and tapes can play a crucial role in repairing specific damage or reinforcing vulnerable areas. For any minor tears or tiny holes that may appear over years of use, a canvas-specific restore patch combined with a robust polyurethane-based sealant can effectively water-resistant the affected area.
Unlike joint tape used on synthetic tents, canvas tents usually don’t require additional stitch sealing, as the seasoning process naturally cauls the tent seams. However, if you notice a persistent leak from a particular stitch after seasoning, a specialized waterproofing solution applied to the underside of the stitch can provide an extra layer of protection, ensuring your tent remains completely dry.
Maintaining Your Waterproof Canvas Tent
Applying UV Protection to Prevent Fabric Degradation
To ensure the longevity and sustained waterproofing of your canvas tent, regular reproofing is essential. applying ultraviolet protection is a critical maintenance step. While canvas material is inherently durable, prolonged exposure to harsh ultraviolet rays can degrade the fabric over years of use, weakening its fibers and compromising its natural water-resistant properties, potentially leading to a leak.
After a thorough tent clean and ensuring your tent is still completely dry, apply a specialized ultraviolet protectant designed for canvas to waterproof a canvas tent. This protective coating acts as a shield, deflecting harmful sun rays and preserving the integrity of the canvas, which is essential for keeping your tent dry and extending its life on many camping trips.
Patching and Repairing Tent Seams
Despite the robust nature of canvas and effective seasoning, wear and tear can occasionally lead to damaged tent seams, necessitating meticulous patching and restore to maintain a water-resistant tent. If you notice any tiny holes or a compromised stitch, a targeted waterproofing treatment is required. First, clean the affected area thoroughly and ensure it is dry.
For minor issues, a dedicated canvas fix patch, applied to the underside of the fabric with a strong, flexible adhesive, can effectively seal the leak. For more significant damage to a joint, stitching the tear closed with a heavy-duty needle and thread before applying a specialized seam sealer or waterproofing solution over the fix will ensure a durable, water-resistant seal, preventing any dampness from entering your tent.
Regular Maintenance Tips for Longevity
Regular maintenance is paramount to ensuring your waterproof canvas tent remains a reliable shelter for many years of use. After each camping trip, conduct a thorough tent clean to remove all dirt, debris, and mildew. Always allow your tent to dry completely, ideally on sunny days, before packing it away; storing a damp tent is a primary cause of mildew and fabric degradation.
Periodically re-evaluate the tent’s waterproofing by performing a water bead test. If water no longer beads effectively, a refresh of the waterproofing coating is due. Addressing minor issues promptly, such as sticky zippers or small fabric abrasions, prevents them from escalating into larger problems that could compromise your tent’s overall durability and water-resistant integrity.
Pro Gear Checklist for Tent Waterproofing
To achieve a factory-level finish, you need more than just a spray bottle. Gathering these specific tools before you start ensures the treatment bonds correctly to the fabric and lasts for the entire season.
The Essential Cleaning Kit:
- Technical Tent Cleaner: Never use household detergents; they strip the DWR coating. Use a specialized soap like Nikwax Tech Wash or a very diluted, mild soap.
- Soft-Bristle Brush: An old toothbrush or a soft nylon brush is vital for scrubbing dirt out of the zippers and seams without tearing the material.
- Non-Abrasive Sponge: Use the soft side only to spot-clean mildew and bird droppings. Avoid green scrubbing pads, as they can scratch off the polyurethane lining.
The Waterproofing & Repair Arsenal:
- Seam Sealer: Ensure you have the correct type (Silicone-based for silnylon tents; Urethane-based for most others).
- Waterproofing Spray: A high-quality DWR refresh spray (like Nikwax SolarProof or Star Brite) to restore the outer water-beading surface.
- Isopropyl Alcohol & Rag: Used to prep and degrease the seams before applying new sealant to ensure a permanent bond.
- Tenacious Tape or Repair Patches: For sealing those “tiny holes” or fabric tears that sprays alone cannot fix.
Environmental Tools:
- The “Sunny Day”: Low humidity and direct (but brief) sunlight are required for the treatment to dry and cure properly.
- Drop Cloth or Tarp: To lay under the tent while treating the floor, preventing new dirt from sticking to your fresh protective coating.
Essential Waterproofing Products
Equipping yourself with the essential waterproofing products is the cornerstone of effective tent maintenance, ensuring your canvas tent remains impervious to the elements during every camping trip. For canvas material, prioritize a high-quality waterproofing solution specifically formulated to penetrate and protect natural fibers, enhancing its inherent water-resistant properties without compromising breathability.
A reliable joint sealer, preferably a polyurethane-based product, is crucial for addressing or preventing leaks in vulnerable tent seams. Don’t forget a general-purpose fabric cleaner suitable for canvas to perform a thorough tent clean before any waterproofing treatment. These products, when used correctly, form a durable protective coating that will keep your tent dry and extend its years of use, especially with regular reproofing.
Recommended Sprays, Sealants, and Brushes


Tools for Tent Maintenance and fix
Beyond waterproofing a tent, a dedicated set of tools for tent maintenance and fix is indispensable for the seasoned camper aiming to keep their tent in prime condition. A sturdy sponge and a garden hose are essential for a thorough tent clean, ensuring all dirt and debris are removed before any waterproofing treatment.
For unexpected repairs on a camping trip, a canvas repair kit containing patches, heavy-duty thread, and a needle is crucial for addressing tiny holes or tears in the fabric or tent stitch. Additionally, a UV protection spray applicator helps to evenly distribute the protective coating, contributing to the durable lifespan of your canvas tent. These tools empower you to proactively maintain and quickly fix your tent, ensuring a dry and comfortable experience every time.


How to Tell If Your Tent Needs Waterproofing
Knowing when to waterproof a camping tent is essential for staying dry and comfortable. Start by inspecting the rainfly and tent body for visible signs: faded fabric, white water stains, or beading failure indicate the durable water repellent (DWR) has worn off. Perform a simple tap test sprinkle water over the fly and watch whether droplets bead and roll off or soak in.
Check seams for seepage by running water along the seam lines or looking for darkened thread after a rain. Inside the tent, look for water spots, damp patches, or wet gear after light showers any sign of leakage means action is needed. Also monitor fabric age and use: frequent backpacking or exposure to UV and dirt accelerates DWR breakdown; most tents benefit from treatment every 1–3 seasons.
Don’t forget zippers and vestibules, where pooled water or sagging indicates compromised waterproofing. If you notice any of these issues, it’s time to learn how to waterproof a camping tent with seam sealer and DWR spray to restore protection before your next trip.
Final Tips for Waterproofing Your Tent
Before you head out into the wild, keep these professional tips in mind to ensure your hard work doesn’t go to waste.
- Avoid the Washing Machine: Never put your tent in a top-loading washing machine. The agitator can tear the fabric and strip the DWR coating instantly. Hand wash only!
- Dry is King: The biggest enemy of a waterproof tent isn’t rain; it’s mildew. Always ensure the tent is bone-dry before storing it for the season.
- Focus on high-wear areas: The floor of your tent takes the most abuse. While you are sealing the seams, give the floor corners an extra layer of polyurethane protection.
- Sunlight is a double-edged sword: Use a sunny day to dry your tent after treatment, but don’t leave it in direct UV light for weeks. UV rays eventually break down even the best protective coatings.
FAQ’s
1. How do you waterproof a canvas tent fast?
Clean the tent, let it dry, then apply a canvas waterproofing treatment evenly.
2. Do canvas tents need waterproofing?
Yes, regular treatment helps maintain water resistance over time.
3. What is the best waterproofing spray for canvas tents?
Use a tent-safe canvas treatment designed for outdoor fabrics.
4. How often should you waterproof a canvas tent?
Usually once a year or after heavy use.
5. Can you waterproof a wet canvas tent?
No, always apply treatment to a clean, dry tent.
6. How long does tent waterproofing last?
It depends on use, weather, and product quality, often several months to a year.
7. Does waterproofing affect canvas breathability?
Quality treatments protect water resistance while keeping breathability.
8. Can I use household sprays on a canvas tent?
No, use products made specifically for canvas tents.
9. How do you test if a tent needs waterproofing?
Sprinkle water on the fabric if it soaks in, retreatment is needed.
10. What is the easiest way to keep a canvas tent waterproof?
Clean, dry, and reapply waterproof treatment regularly.
Conclusion: How to Waterproof a Tent
Waterproofing a camping tent is a straightforward, essential step that protects your gear, comfort, and safety in wet conditions. Begin by understanding your tent’s materials and seams, then choose appropriate treatments such as seam sealants for stitching, silicone or polyurethane-based sprays for fabric, and durable water repellent (DWR) restorers for outer coatings. Clean and dry the tent thoroughly before application, follow manufacturer instructions, and apply treatments evenly to avoid spotting or clogging breathability.
Reinforcing high-wear areas like the floor and entry points with additional seam sealing or a groundsheet reduces water intrusion and extends tent life. Regular maintenance reapplying DWR seasonally, checking seams after heavy use, and storing the tent dry prevents degradation and keeps performance consistent. During use, proper set-up techniques like taut pitching, using a footprint, orienting vents, and creating runoff paths for water minimize ponding and leakage.
For long-term care, repair torn fabric and replace damaged zippers promptly to maintain integrity. Balancing waterproofing with ventilation preserves a comfortable interior environment and reduces condensation. With routine attention and the right products, you can significantly improve your tent’s resistance to rain without compromising breathability or packability. Ultimately, investing a little time upfront in waterproofing and upkeep pays off with drier, more enjoyable camping trips and a tent that lasts seasons longer.